
Tutorial overview
What we will make
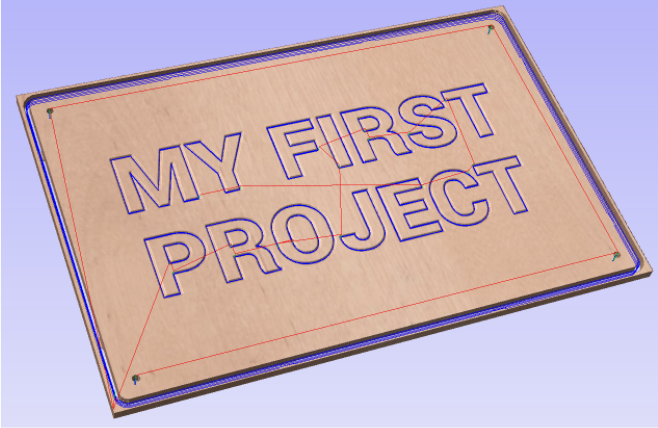
In this tutorial we will create a simple rectangular sign out of 12mm plywood, with engraved text and mounting holes in the corners.
We will create the job file using Vectric VCarve Pro 10.5 to generate the CAD/CAM (you will be able to download the files if you want to skip the Vectric tutorial).
We will use SmartBench to manufacture the part.
We will use:
-
Sheet of 12mm thick birch plywood, minimum size of 650mm x 650mm (25.5” x 25.5”)
-
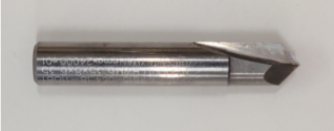
6mm flat end cutter

-
6.35mm 90° v-groove engraving cutter
Pre-requisites
You should only start this tutorial after completing the “First setup” tutorial. This will make sure your SmartBench is set-up and ready to go.
Click here to open the “First setup” tutorial.
Process overview
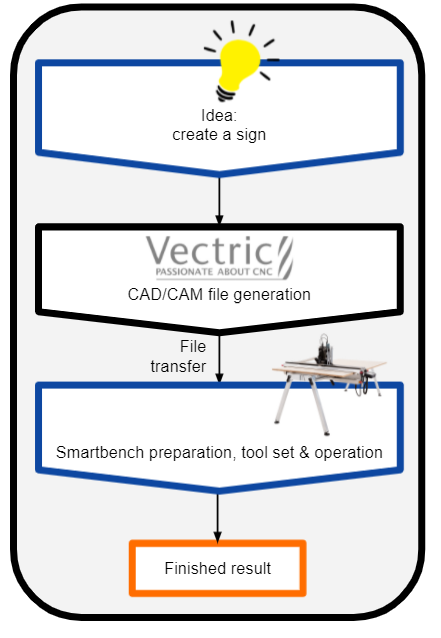
Here’s a flow chart to illustrate the processes involved, followed by links to each article in this tutorial.
These are the areas we will cover:
CAD/CAM file generation
SmartBench preparation, tool set & operation
How to work through this tutorial
There are a number of ways to work through this tutorial with us. Either:
-
Work through our Knowledgebase articles in order. The tutorial is broken down into a series of bitesize articles. We show a video for that specific article, written stages and we link to any resources you may need.
-
Or, click here to follow our YouTube combination video.