
How to swap the PCB
How to replace the PCB on the Mafell SC0, SC1 and SC2 spindles
Remove rear cover
Tools needed
T20 driver
Pliers (optional)
Remove cover
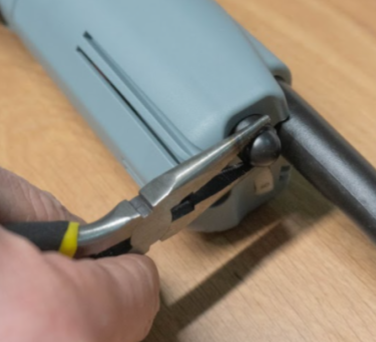
If you have an older spindle - remove the plastic cover from speed control port with pliers (optional) or remove the speed control cable if plugged in
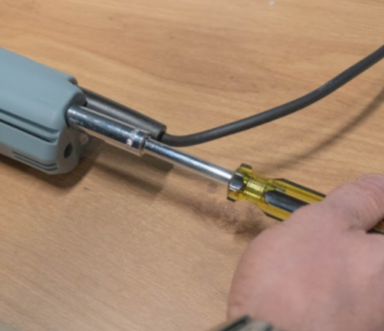
If present, remove captive nut from speed control port using 10mm nut driver (This may not be present on newer spindles)

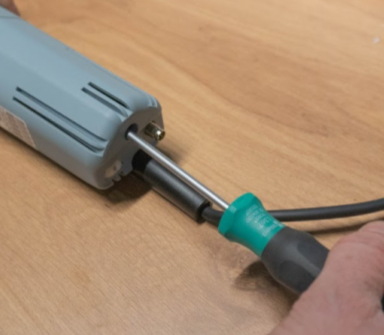
Using Torx 20 driver, remove screw from casing. Keep the screw for refitting.

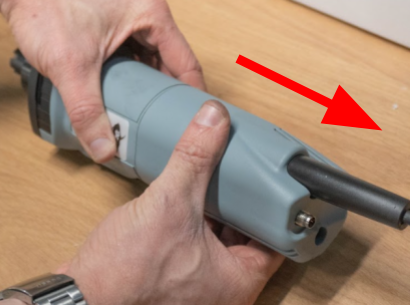
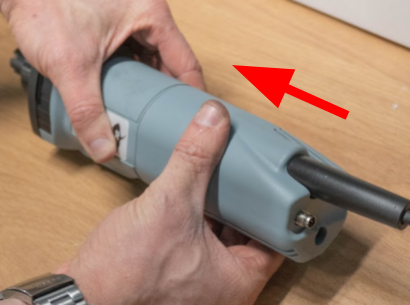
Slide rear cover away from main body.
|
|
As you slide the cover off, it is common for the screw to fall out as you tip the rear cover back. Catch the screw - you will need it later! |

Disconnect the original PCB
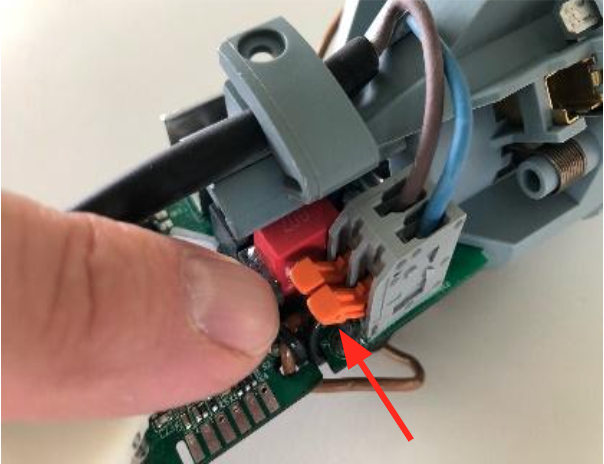
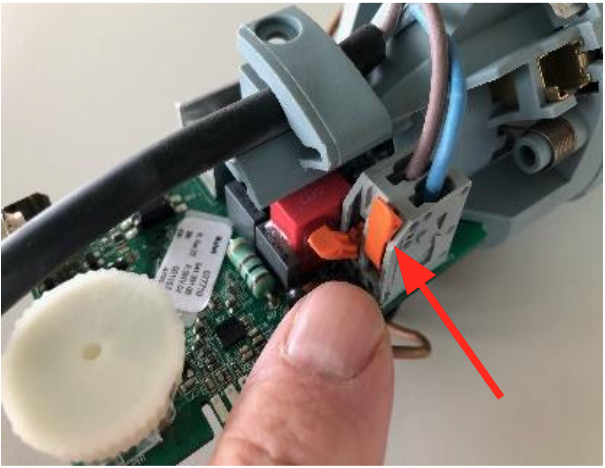
Open both terminal contacts of the power wires and pull out both wires. Note: Push orange levers all the way down to release.
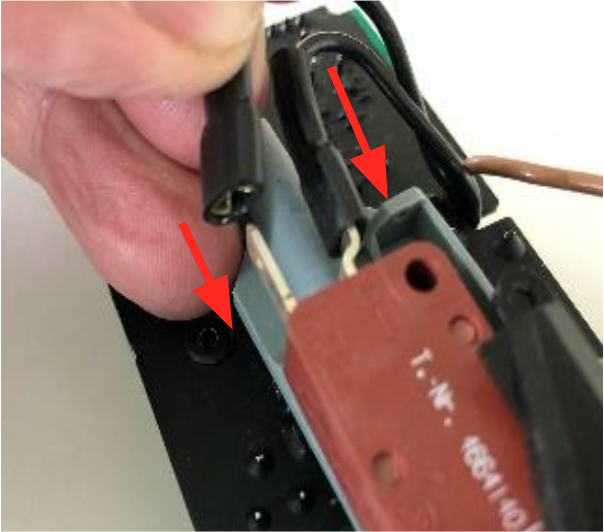
Remove the 2 black wires with contact shoes from the main switch.
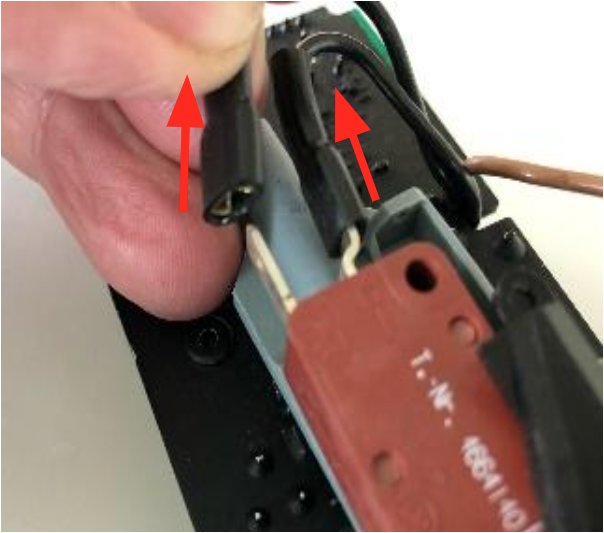
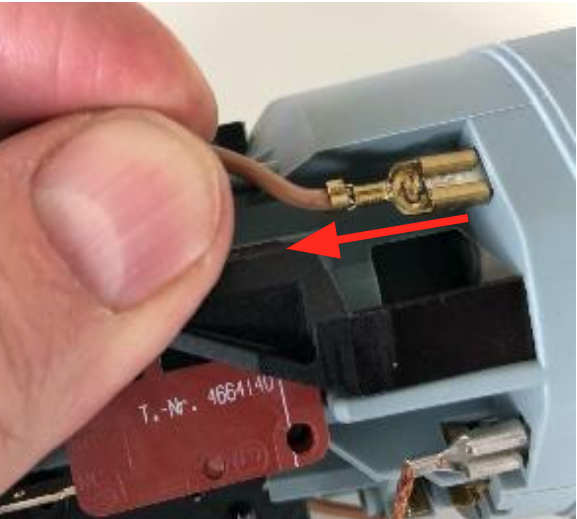
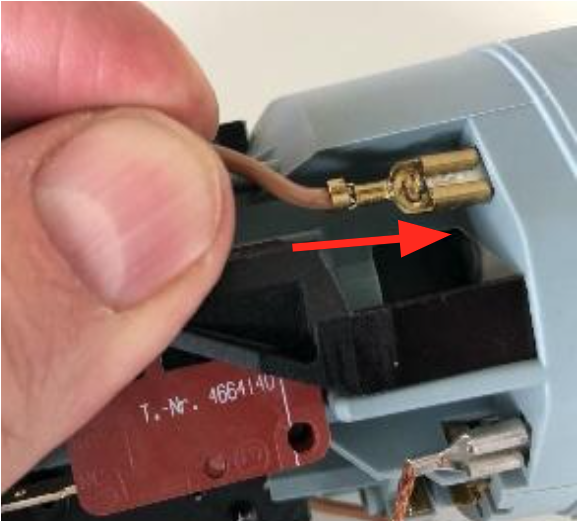
Remove the 2 brown wires with contact shoes from the motor pins. See note on use of pliers below before attempting.
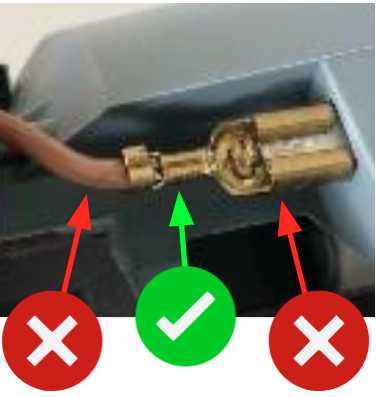
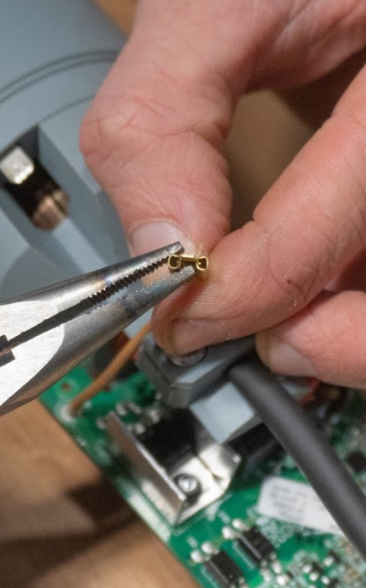
Use of pliers is recommended, but only clamp on the section indicated below. Clamping elsewhere risks permanently damaging the components.
Remove and replace the PCB
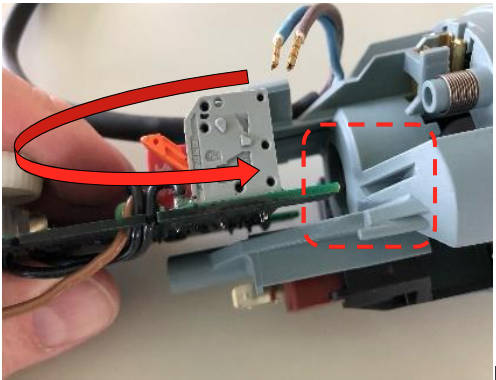
Remove the old PCB and then insert the new PCB (note the correct setting in the slot).
Remember to change over your speed dial to your new PCB, this needs to be located so that you can choose between the options 1-6
Insert the 2 power wires into the terminal contacts and close the contacts. These blue and brown cables can go either way around for reference.
Re-connect all contact crimps from the PCB to the main switch (black wires) and the motor (brown wires)
Ensure the power crimps are tight is loose close them over gently with a pair of pliers
Further checks
With the rear cover off this is a great time to check the condition of the rest of the spindle:
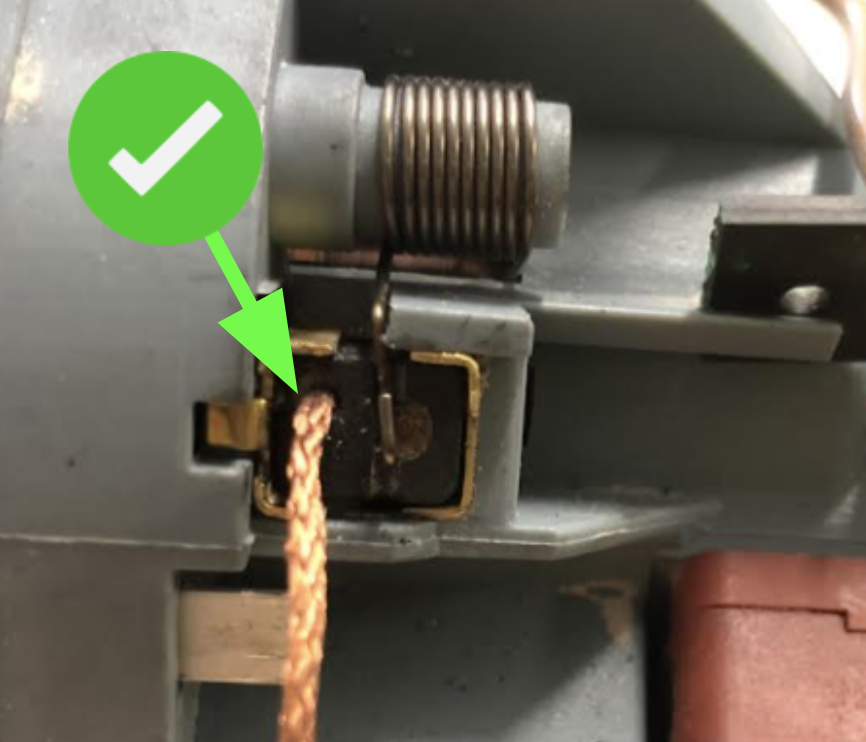
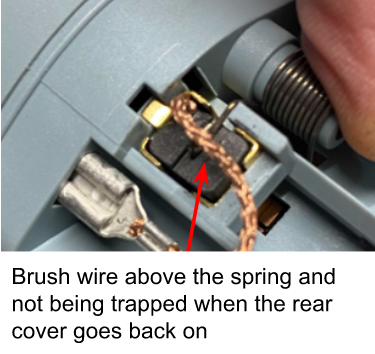
Check that the brush wire is installed on the correct side furthest from the PCB - see this link for further reference. Make sure the brush wire is above the retaining spring and not fouling on anything especially when the rear cover goes back on.
Take the time to clean any dust or debris from around the brush housing and clean the spindle of any extra debris.
Replace rear cover
Using a T20 Torx driver, re-tighten the retaining screw.
To confirm correct installation, loosen the rear cover screw, slightly twist the rear cover clockwise while holding the main body of the spindle motor then retighten the rear cover screw.
