How to load the spindle into the Z Head correctly
Make sure that the spindle motor switch is in the On position.
A: Spindle motor switch


Load the spindle motor into the Z Head from the top. Ensure that the switch is facing straight forward towards the home end of the X Upper Beam else the spindle motor will foul the cage and won’t fit.
|
|
Take care not to hit the cutter as the sharp edges are delicate. |

|
|
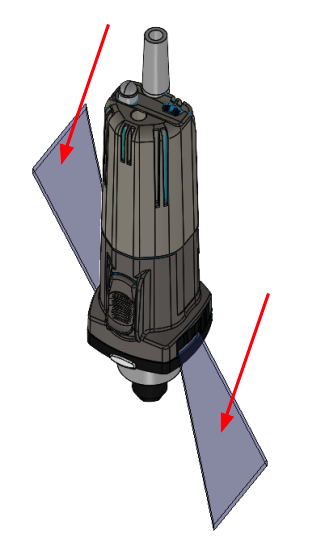
The spindle motor has air ducts on each side to allow for air to pass through to cool the internals during use as shown below. |


With the spindle motor inserted into the Z Head, rotate the spindle motor anti clockwise so the switch is in line with the front edge of the aluminium pillar to maximise airflow for cooling.

Air flow out of the spindle: A


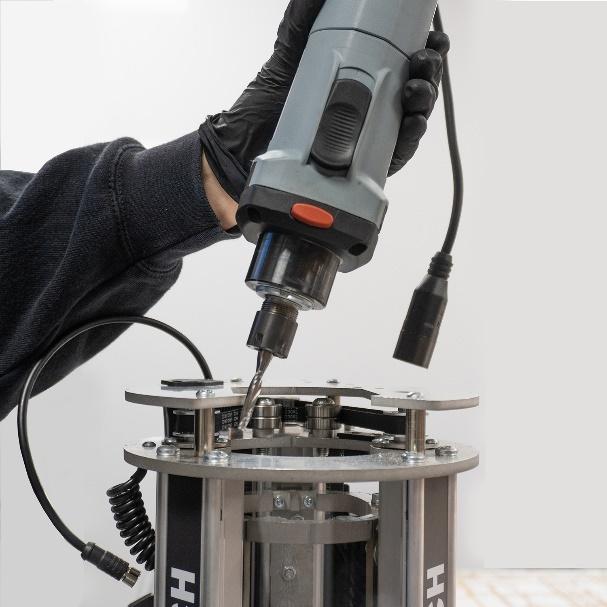
Once the spindle motor is in place in the Z Head, tighten the clamping bolt:
- Ensure the clamping bolt is greased every 50 hours of use to ensure correct clamping torque - Click here to learn how to grease this
-
Using the supplied T driver, tighten the clamping bolt until you feel the point at which the spindle motor can not longer rotate.
-
Then apply a MAXIMUM of EITHER:
-
1/8th turn, OR
-
additional 45° turn
-
Do not over-tighten, since this will over-compress the bearings in the spindle, reducing its life. If the clamping bolt feels sticky, please refer to the video which illustrates how to lubricate the threads correctly.

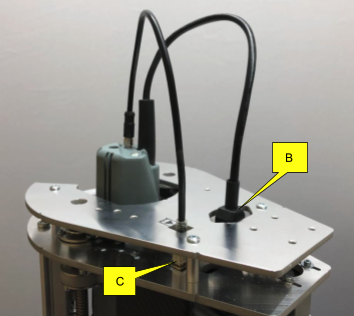
Plug the power and signal cables back into the Z Head.
B: Power cable
C: Signal cable