
Understand your Z Head versions
Understand your Z Head versions
Before doing any replacements, it is important to understand your version of the Z Head as they have slight structure differences.
Z Head 1 (AMB spindle)
If you are using Z Head 1 on your SmartBench, then the X limit switches can easily be replaced without needing to open any casing.

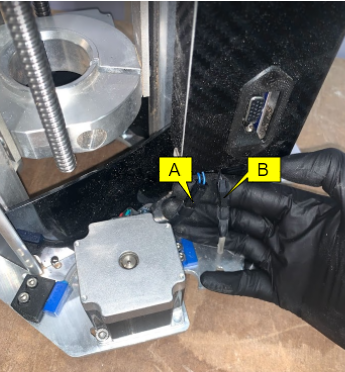
The X limit switch(es) connector can easily be accessed by pulling the cables out as shown in the image. Once you have access to the connector you can read Replacing the switches section to do the replacement.
|
|
Some versions of this Z Head 1do not have X limit switch(es) connector and the connection is made directly to the PCB. If you have such a Z Head then please submit a support ticket by clicking here and our customer support team will provide you with further guidance. |

A: X axis home (connector)
B: X axis max (connector)

Z Head 2 (SC1 spindle)
If you are using Z Head 2 on your SmartBench, then the X limit switches can easily be replaced without needing to open any casing.

The X limit switch(es) connector can easily be accessed by pulling the cables out as shown in the image. Once you have access to the connector you can read Replacing the switches section to do the replacement.
A: X axis home (connector)
B: X axis max (connector)
Z Head 2b (SC1 spindle)
If you are using Z Head 2b on your SmartBench, then you have to remove the casing to replace the X limit switches. To understand the casing removal procedure click here.
C: Casing
