Cleaning your axes
SmartBench X & Y axes have racks and pinions, and channels for the wheels. Cleaning of those parts is required as periodic maintenance. The Z axis has channels for the wheels.
You will need the following tools to clean:
-
Paper towels
-
Brush
-
Cleaning liquid/spray (optional) - take care not to contact onto any plastic parts
Cleaning X axis
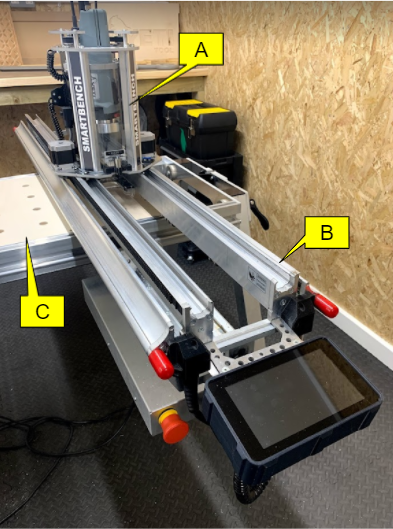
The X Beam is where the Z Head runs.
A: Z Head
B: X Beam
C: Y Bench
Procedure
Power SmartBench off (click here to learn more about correct power down procedure).
Start by first removing the Z Head from the Upper X Beam. Click here to learn how.

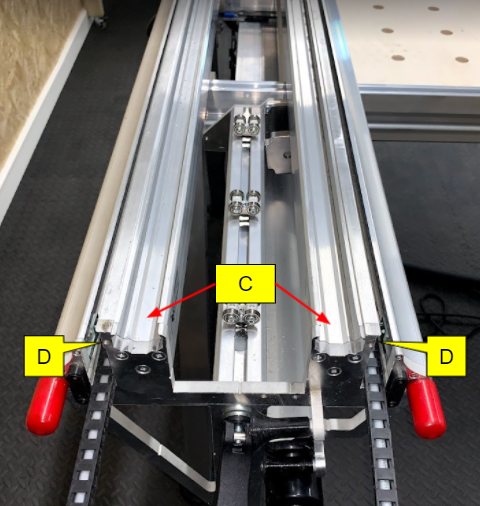
After removing the Z Head you will have full access to the Lower X Beam wheels and racks.
C: Z Head wheel channels
D: Pinion channels
The Z Head wheel channels can be cleaned with a paper towel, it is optional to use any cleaning solvent.

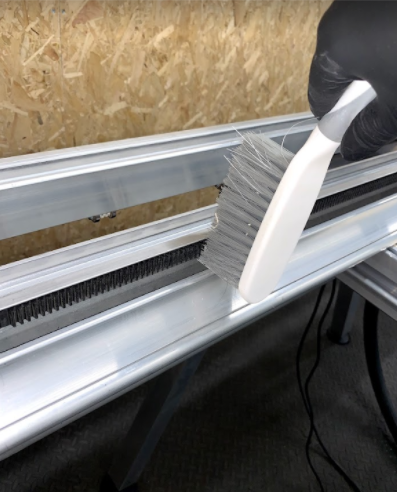
While cleaning the X racks, pay special attention to the swarf sticking to the bottom of the teeth.
Cleaning Y axis
Remove Upper & Lower X Beams to get access to the Lower X Beam wheels and pinions. Click here to learn how.
K: Upper X Beam
L: Lower X Beam

Cleaning Y racks and the wheel channel
The racks of the Y Bench are located on the underside of the channel.
O: Racks

You can use a toothbrush to remove all the swarf in the teeths of the racks.

The wheel channels are located on the underside of the bench.

Clean them using a paper towel, it is optional to use any cleaning solvent.

Cleaning the Z-Axis wheel channels
|
|
Disconnect the Z-Head from SmartBench and remove the spindle motor. We recommend working on a flat surface |
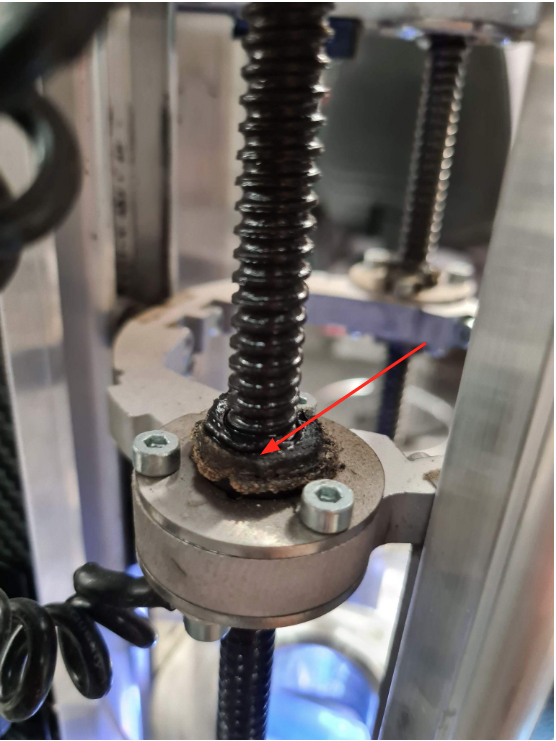
There are three Z-Head wheel channels, to retain Z-Accuracy ensure these are cleaned out when required. This prevents stalling of the Z-Axis motor and any accuracy issues. This should be done in conjunction with cleaning and greasing the lead screws
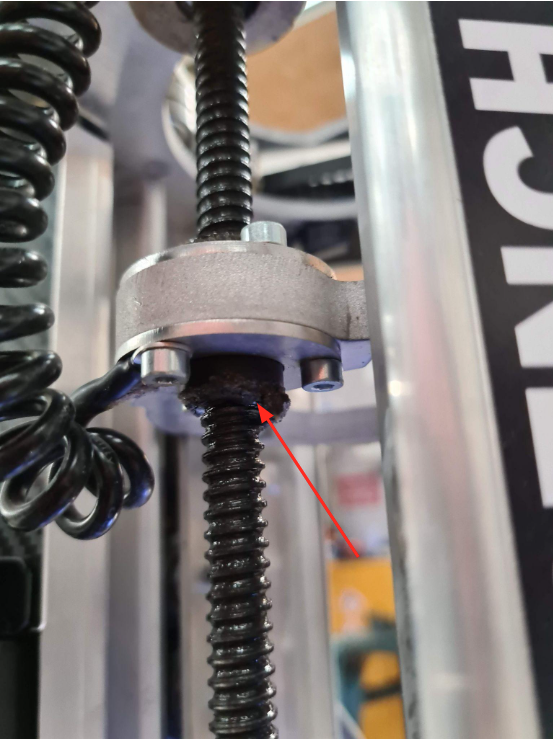
When you go to clean the bottom of these channels you can do this by lifting the spindle cage upwards and by lifting up the spindle cage safety plastic windows


It is also worth cleaning any grease buildup around the spindle cage nuts on the lead screws, example which needs cleaning below