
Setting up FileZilla
Install FileZilla
You will first need to download and install FileZilla FTP on your computer.
Click here to go to the FileZilla website, and follow their instructions to download and install FileZilla Client on your computer.

Find out which IP address your SmartBench is using
An “IP address” is a label which is given to SmartBench by your Wi-Fi router. The Wi-Fi router does this automatically for you, as soon as SmartBench connects to it.
FileZilla will use SmartBench’s IP address to identify it on your Wi-FI network.
But you do need to find and note down your console’s IP address.
In the console menu, click on the “Pro” App.

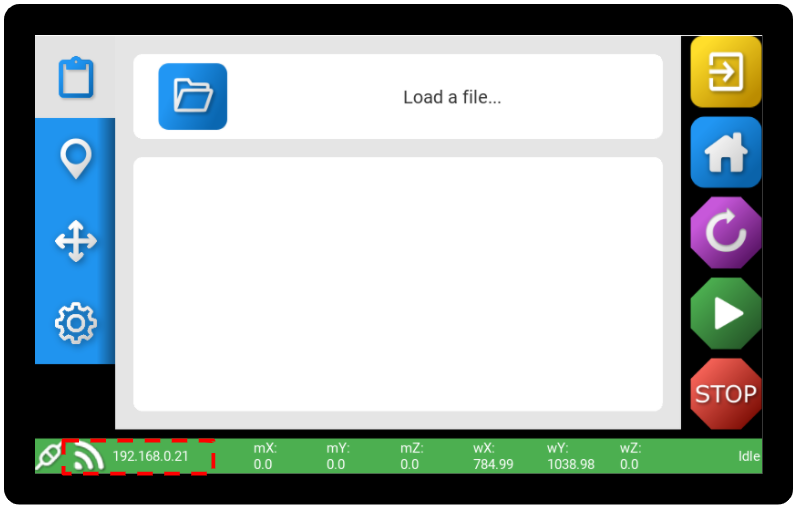
If you are connected to a Wi-Fi network, you will see the IP address in the bottom left corner of the Pro App on your console. It will look like 4 numbers, separated by full stops e.g. 192.168.0.21.
Write your SmartBench’s IP address down - we will use it later.
Connecting to your SmartBench from FileZilla
Open FileZilla on your computer.
You may have an icon that looks like this on your desktop, or in your application menu. Double click on it.

Open the Site Manager in FileZilla, by clicking on “File” in the top left corner, and then “Site Manager…” in the dropdown menu.

Click on “New site” on the left hand side of the popup.

A new site will be created in the folder “My Sites”. Give it a name. You might like to call it “YetiTool SmartBench”, or you can get creative.

On the right hand side of the popup, select the “General” tab.

Click on the drop down menu labelled “Protocol:”, and select “SFTP - SSH File Transfer Protocol” from the options.

Under the dropdown, enter the connection details.
-
In box A, “Host:” enter the IP address that you noted down from the SmartBench console earlier.
-
Leave box B, “Port:”, blank.
-
Select the “Logon Type:” to be “Normal” if it is not already selected (box C).
-
Enter “pi” into box D for the “User:”, and “pi” into box E for the “Password:”

Click “Connect”.

Check the box that says “Update cached key for this host”, and click “Ok”.

A successful connection will display something like:

You are now ready to transfer your files!